Installing expansion joints with socket weld (SW) flanges is a critical process in many industrial applications, especially in piping systems where temperature variations, vibration, and movement can cause stress on the pipes. As a reliable SW flange supplier, I have extensive experience and knowledge in this area. In this blog, I'll guide you through the step - by - step process of installing expansion joints with SW flanges.
Understanding Socket Weld Flanges
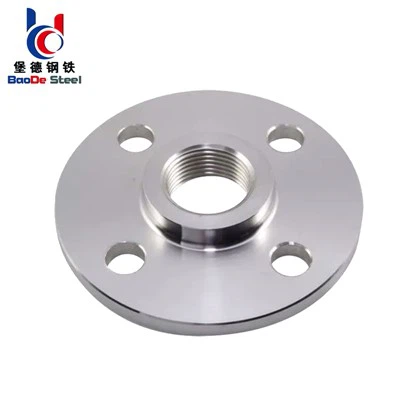
Before we dive into the installation process, it's essential to understand what Socket Weld Flanges are. Socket weld flanges are a type of pipe flange that is designed to be welded onto the outside of the pipe. They have a socket or recess where the pipe fits into, providing a smooth bore and a strong connection. The socket weld connection is known for its excellent resistance to vibration and is commonly used in small - diameter piping systems. For instance, the 1 Inch Socket Welded Flange is a popular choice for applications that require a relatively small - sized pipe connection.
Pre - installation Preparations
- Inspection of Components
- Carefully inspect the expansion joint and the SW flanges. Check for any signs of damage, such as cracks, dents, or corrosion on the flanges. For the expansion joint, ensure that it is the correct size and type for your application. The bellows of the expansion joint should be free from any manufacturing defects.
- Measure the dimensions of the pipe and the flanges to ensure a proper fit. The inside diameter of the SW flange socket should match the outside diameter of the pipe.
- Cleaning
- Clean the pipe ends and the inside of the SW flange sockets thoroughly. Use a wire brush or a suitable cleaning agent to remove any dirt, grease, rust, or scale. A clean surface is crucial for a strong and reliable weld.
- For the expansion joint, clean the connection points to prevent any contaminants from affecting the joint's performance.
- Marking and Alignment
- Mark the position on the pipe where the SW flange will be installed. This ensures accurate alignment during the welding process. Use a measuring tape and a marker to make clear and precise marks.
- Align the expansion joint with the pipes and the flanges. Make sure that the joint is centered and that the movement direction of the expansion joint is in line with the expected movement in the piping system.
Installation Steps
- Inserting the Pipe into the SW Flange
- Carefully insert the pipe into the socket of the SW flange. Leave a small gap (usually about 1/16 inch) at the bottom of the socket to allow for expansion during welding. This gap helps prevent the pipe from buckling or distorting when heated.
- Ensure that the pipe is fully seated in the socket and that it is perpendicular to the flange face. Use a level or a square to check the alignment.
- Tack Welding
- Once the pipe is properly inserted and aligned, perform tack welding. Tack welding is a temporary welding process that holds the flange and the pipe in place before the final welding.
- Make small welds at several points around the circumference of the flange - pipe connection. The number and size of the tack welds depend on the size of the flange and the pipe. Usually, 3 - 4 tack welds evenly spaced around the joint are sufficient.
- Use the appropriate welding electrode and welding parameters for the material of the flange and the pipe. For example, if you are using stainless steel flanges and pipes, select a stainless - steel welding electrode.
- Final Welding
- After the tack welding, proceed with the final welding. The welding process should be carried out according to the relevant welding codes and standards.
- Weld around the entire circumference of the flange - pipe connection in a continuous and uniform manner. Use a welding technique that provides good penetration and fusion. For SW flanges, a fillet weld is commonly used.
- Control the welding speed, current, and voltage to ensure a high - quality weld. Avoid over - welding, which can cause distortion and stress in the joint.
- Connecting the Expansion Joint
- Once the SW flanges are welded to the pipes, it's time to connect the expansion joint. Bolt the expansion joint to the SW flanges using the appropriate bolts and gaskets.
- Tighten the bolts evenly in a criss - cross pattern to ensure uniform pressure distribution. This helps prevent leaks and ensures a proper seal between the expansion joint and the flanges.
- Refer to the manufacturer's instructions for the recommended torque values for the bolts. Over - tightening or under - tightening the bolts can lead to problems such as leakage or premature failure of the joint.
Post - installation Checks
- Visual Inspection
- After the welding and connection process is complete, conduct a visual inspection of the joints. Check the welds for any signs of cracks, porosity, or incomplete fusion. The weld bead should be smooth and uniform.
- Inspect the connection between the expansion joint and the flanges. Ensure that the gaskets are properly seated and that there are no visible gaps or misalignments.
- Pressure Testing
- Perform a pressure test on the piping system. This helps to verify the integrity of the welds and the connections. Slowly increase the pressure in the system to the test pressure specified for your application.
- Monitor the system for any signs of leakage. If any leaks are detected, mark the location and repair the joint accordingly. After the repair, repeat the pressure test to ensure that the problem has been resolved.
- Function Testing
- If possible, simulate the normal operating conditions of the piping system to test the function of the expansion joint. Check if the expansion joint can accommodate the expected movement and if it operates smoothly.
- Observe the system for any abnormal vibrations, noises, or changes in pressure during the function testing.
Conclusion
Installing expansion joints with SW flanges requires careful planning, proper preparation, and precise execution. As a SW flange supplier, I understand the importance of high - quality components and a reliable installation process. By following the steps outlined in this blog, you can ensure a successful installation of expansion joints with SW flanges in your piping system.
If you are in need of high - quality SW flanges for your expansion joint installation projects, or if you have any questions about the installation process, feel free to contact us for further discussion. We are committed to providing you with the best products and technical support.


References
- ASME B16.5 - Pipe Flanges and Flanged Fittings
- AWS D1.1 - Structural Welding Code - Steel