Hey there! I'm a supplier of threaded flanges, and today I'm gonna share with you how to measure a threaded flange. Whether you're a DIY enthusiast or a professional in the industry, getting the measurements right is crucial for a successful project. So, let's dive in!
Why Accurate Measurements Matter
Before we get into the actual measuring process, let me tell you why it's so important to measure threaded flanges accurately. First off, a well - measured flange ensures a proper fit. If the measurements are off, you might face issues like leaks, misalignment, or even structural failures. This can lead to costly repairs and downtime, which is definitely not what you want.
Tools You'll Need
To measure a threaded flange, you'll need a few basic tools. A good quality caliper is a must - have. It allows you to measure the inside and outside diameters with high precision. You'll also need a ruler or a tape measure to measure the overall length and other linear dimensions. And don't forget a thread gauge. This tool helps you determine the pitch and size of the threads.
Measuring the Outside Diameter (OD)
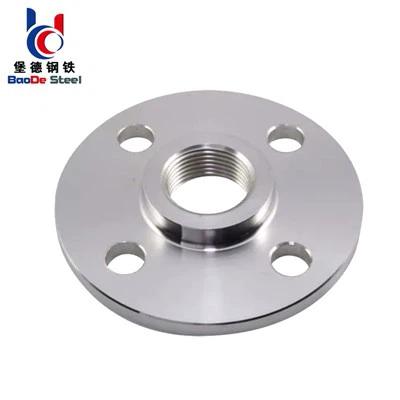
The outside diameter is one of the most important measurements. To measure the OD, simply open your caliper wide enough to place it around the outer edge of the flange. Make sure the caliper is perpendicular to the flange's axis. Gently close the caliper until it snugly fits around the flange. Then, read the measurement on the caliper's scale. Write it down; you'll need it later.
Measuring the Inside Diameter (ID)
The inside diameter is equally important, especially if you're dealing with a pipe that needs to fit through the flange. Insert the caliper into the hole of the flange. Open the caliper's jaws until they touch the inner walls of the flange. Again, ensure the caliper is perpendicular to the axis. Once it's in place, read the measurement. This ID measurement will help you match the flange with the right - sized pipe.
Measuring the Thickness
The thickness of the flange can affect its strength and how it fits into your system. Use a caliper or a ruler to measure the thickness. Place the measuring tool on the flat surface of the flange, from one side to the other. Measure at multiple points around the flange to ensure consistency. If there's a significant variation in thickness, it could indicate a manufacturing defect.
Measuring the Bolt Hole Circle Diameter (BHCD)
The bolt hole circle diameter is the diameter of the circle that passes through the center of all the bolt holes in the flange. To measure it, first, find the center of the flange. You can do this by drawing two or more chords across the flange and finding their mid - points. Then, measure the distance from the center of the flange to the center of one of the bolt holes. Multiply this measurement by 2 to get the BHCD.
Measuring the Bolt Hole Size
Use a caliper to measure the diameter of the bolt holes. Place the caliper jaws inside the bolt hole and open them until they touch the inner walls. Read the measurement. This will help you select the right - sized bolts for your flange.
Measuring the Threads
This is where the thread gauge comes in handy. Place the thread gauge on the threads of the flange. Match the gauge's teeth with the threads until you find a perfect fit. The gauge will tell you the thread pitch and size. This information is crucial for ensuring that the bolts or other threaded components will fit properly.
Special Considerations for Threaded Welded Flanges
If you're dealing with a Threaded Welded Flange, there are a few extra things to keep in mind. The welding process can sometimes affect the dimensions of the flange. So, it's a good idea to measure the flange after welding to make sure everything is still within the acceptable tolerance. Also, check for any signs of distortion or warping that could affect the fit.
Double - Checking Your Measurements
Once you've taken all the measurements, it's always a good idea to double - check them. Measure each dimension at least twice to ensure accuracy. If you get different results, measure a third time and take the average. This can help eliminate any errors caused by human error or tool inaccuracy.


Documenting Your Measurements
It's essential to document all your measurements. You can use a notebook or a digital spreadsheet to record the values. Include details like the date of measurement, the tool used, and any notes about the condition of the flange. This documentation will be useful for future reference and for sharing with others involved in the project.
Conclusion
Measuring a threaded flange might seem like a simple task, but it requires attention to detail and the right tools. By following the steps I've outlined above, you can ensure that you get accurate measurements every time. And if you're in the market for high - quality threaded flanges, I'm here to help. Whether you need a single flange for a small project or a large quantity for an industrial application, I can provide you with the right products.
If you have any questions about measuring threaded flanges or if you're interested in purchasing from our range of threaded flanges, feel free to reach out. We're always happy to assist with your procurement needs and ensure that you get the best - fitting flanges for your projects.
References
- ASME B16.5 - 2017, Pipe Flanges and Flanged Fittings: NPS 1/2 through NPS 24 Metric/Inch Standard.
- API 6A - 2022, Specification for Wellhead and Christmas Tree Equipment.